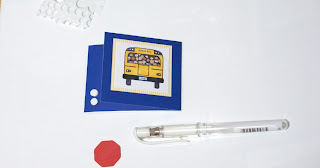
With the end of school comes the responsibility of recognizing those who work hard throughout the year. Each family at our bus stop chipped in to get a gift card for the bus driver. Mrs. T is great, so friendly and nice, the kids love her. More than once did I hear of her generosity towards the kids and we wanted to thank her for that. I offered to make a card for her that would hold the gift card. I decided to make one similar to the one I made that was shared on the AMN blog a few weeks ago. Someone had commented that it would be nice to have a tutorial on how to make it, so I took a few "in progress" photos.

Here is the strip of cardstock to begin. It measures about 3" by 8.5". I actually didn't measure the height, but it needs to be just a little bigger than a gift card.
Next, I laid a gift card in the center of the cardstock. I scored lines at 3.75" and 7.25". Then, gently fold on the score lines.
Next, trim off some of one side. This is really up to you. For the one on the AMN blog, I trimmed about an inch, then cut off the corners. This one is more simple; I cut off about .75".
Since this was for a bus driver, I used the school bus. I just love those happy faces! Then, using my Slice, I cut a small octagon, like the ones on a school bus. What you need next is to put a pop dot or two on the longer of the two flaps, just outside where the top flap would lay.
I wrote Thanks and outlined the octagon with a white gel pen, then adhered it to the pop dots, just off center, so that it covers the top flap, to keep the card closed.
Here is the inside. I put a glue dot with a plastic cover inside so that the gift card could be placed right on top of it. Just for fun, I had a secret message for Mrs. T when she uses her gift card.
For the teacher gift card, I added more to the inside of the card, but we wanted to have the kids sign their names, so it is blank. But, you could get creative with it. I like this design; it takes very little time and can be customized for anyone or any occasion.
When I started writing this, I realized that I had another series of pictures of a project that I have been meaning to share for a long time now. So, I'll have something else for you soon!
card info: cobalt blue, petite gingham yellow and swiss red cardstock, school bus fun, you're the best by A Muse Artstamps, Signo white gel pen, pop dots, glue dot.


1 comment:
What an AWESOME idea :)
Post a Comment