
Many people commented that they had not seen the colored pencil technique over chalk ink before and asked for some instructions on how to do it. I have been wanting to try the wild rose in a different color, so I photographed the process for you.

First, I stamped the wild rose in white ink then masked the roses and stamped the wild rose branch in a light green. The key to this technique is to apply the light colors first, similar to rock and roll stamping. I then used a darker green colored pencil to apply shading to the leaves. With this, the best thing to do is to think of shadows. Where would those be on a leaf? Well, if a blossom is covering a leaf, the shadow is closest to the flower.

After you've added your dark green, go back, and very sparingly, add some brown (or even darker green) in small areas. This just adds to the depth, so you can stick with the one color if you want.
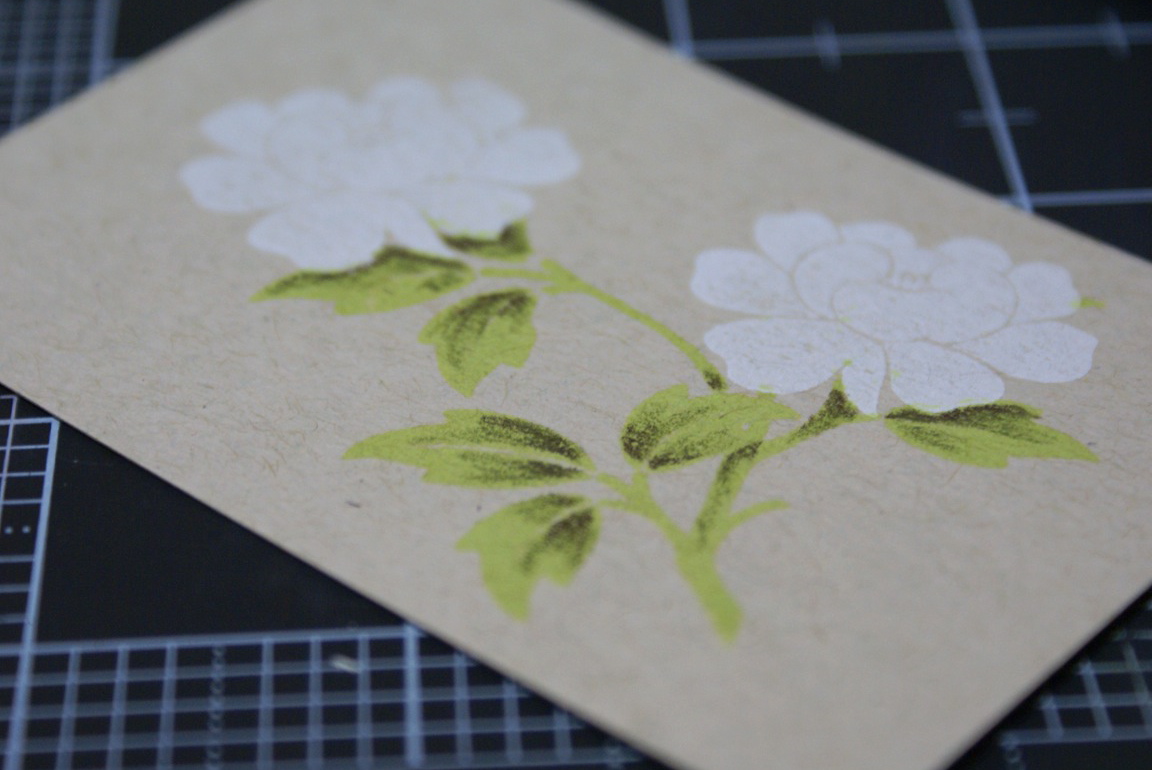
I went back with my dark green pencil and added a bit more along the leaf edges. At this point, you can even use a light green pencil to cover any spots to decrease the shading.

Now, time to tackle the roses! My parents have had roses that are very light in color with hints of darker pink, so I was trying to duplicate that. First, I went with a light peach colored pencil to add shading close to the center of the blossom. Notice the center petal; the back of the petal is what is facing out, so the pink color wouldn't be visible, so it is left white. I also added some light green and small dots of dark pink to the center of the bloom.

To finish off the rose, I went back with a darker color pink and added detail in small bits.

The final step was to add just a hint of white colored pencil to the veins on the leaves. The white gives some oomph to the leaves. I used this as a cover to a small notebook to keep my "to do" lists!

This close-up should give you a better look at the detail of the project. I hope that helps any of you wanting to give this a try. If you have more questions, please let me know!
stamps: wild rose and wild rose branch by A Muse Artstamps
paper: kraft cardstock
ink: limepeel fluid chalk, frost white pigment ink by ColorBox
colored pencils: white, light peach, pink, moss green, dark umber by Prismacolor
8 comments:
oh awesome! this is such a helpful post! THANK YOU!
Wow, absolutely stunning!
This is incredibly beautiful - thanks so much for the tutorial!!
Just GORGEOUS, Elena! Gorgeous!
The roses turned out so beautiful and you're such a good teacher! I come to your blog all the time, your style is similar to mine and I just love seeing what you come up with. Thanks for the inspiration.
This is an awesome tutorial. Sometimes just stamping and coloring an outlined image isn't enough. Your roses are so realistic I can almost smell the scent. Thanks so much for posting this for us.
This is awesome! I like the design. I find it beautiful. Great job!
That is a great technique. Love what you did on the cover to your journal book.
Post a Comment